


Ejector Pins in Injection Molding: Function, Types, and Failure Causes
Ejector pins injection molding systems use hardened steel pins to push cooled plastic parts out of a mold cavity after each cycle. Correct pin type, placement, and material selection help prevent ejector marks, sticking, pin bending, and uneven ejection force. Most failures come from poor alignment, excessive force, abrasive materials, or weak maintenance practices.
A mold can produce accurate parts for years, then suddenly start leaving marks, sticking parts, or bending pins. In many cases, the ejector system is the problem. Ejector pins seem simple, but their size, placement, and surface condition affect cycle stability, cosmetic quality, and mold life. Understanding how they work helps manufacturers reduce scrap, downtime, and expensive tooling repairs.
What are ejector pins in injection molding?
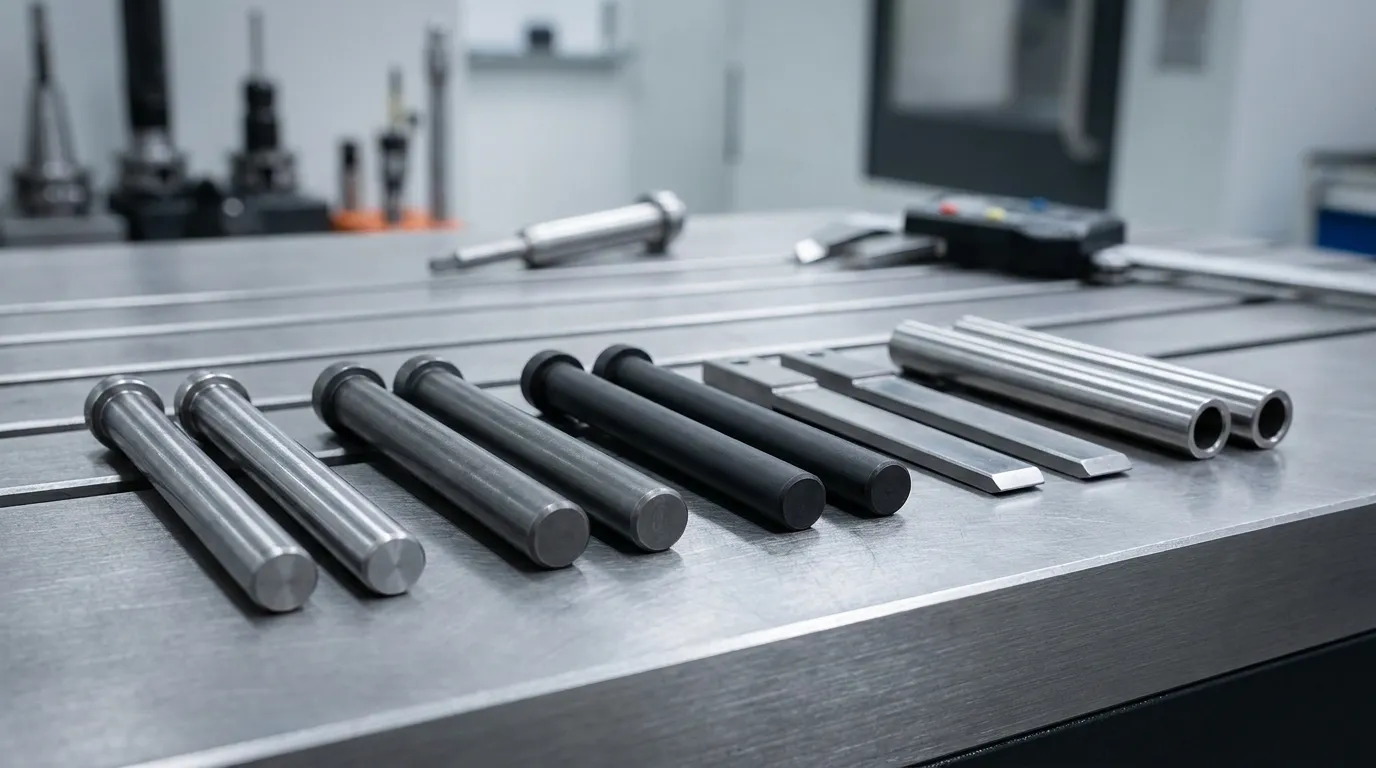
Ejector pins in injection molding are hardened steel pins that push cooled plastic parts out of the mold cavity after molding. Their placement, size, and material directly affect part quality, cycle stability, and mold lifespan.
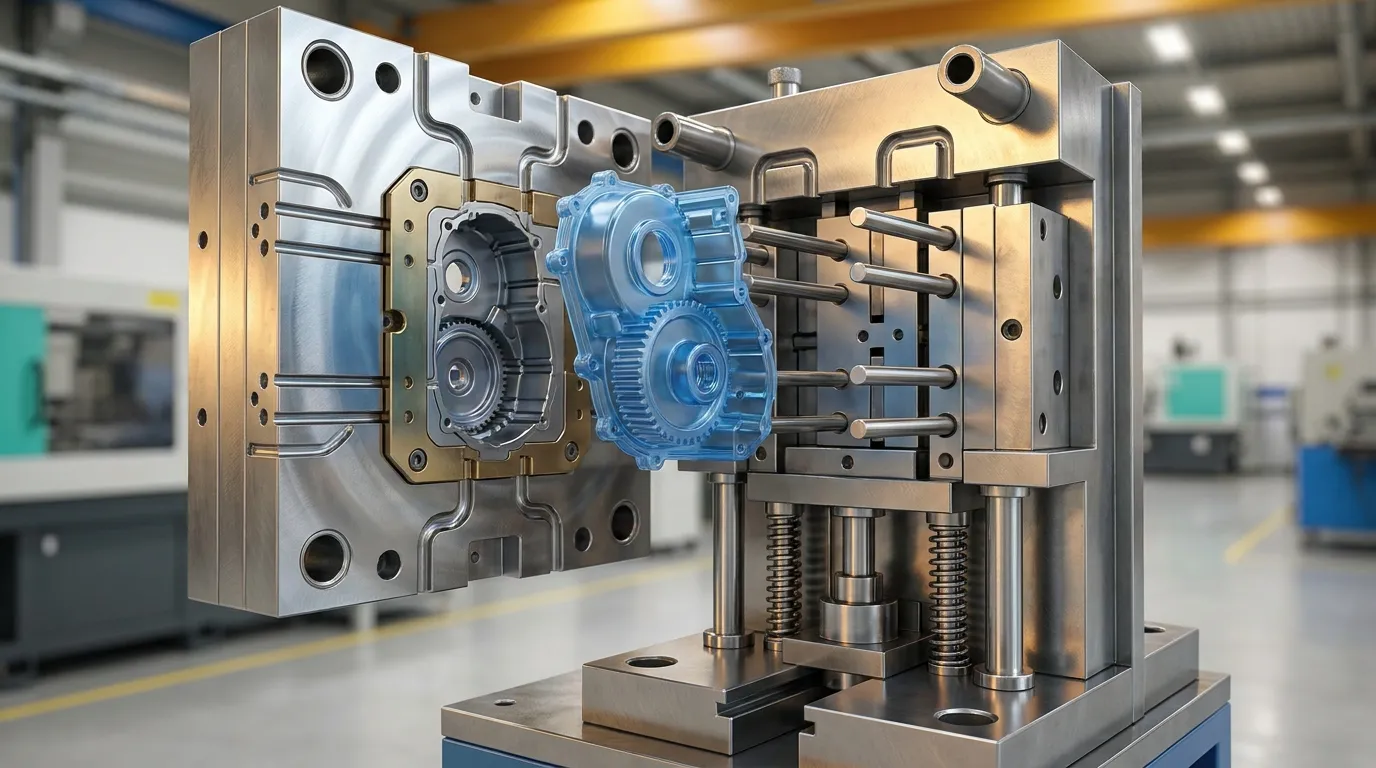
Ejector pins are part of the mold ejection system. After the plastic cools and the mold opens, the pins move forward and push the molded part away from the core side of the mold. Without them, many parts would stick inside the cavity and stop production.
Most ejector pins are round hardened steel rods. They sit inside precisely machined holes and connect to an ejector plate behind the mold. When the machine activates the ejector system, the plate moves forward and drives the pins against the molded part.
The pin layout matters as much as the pins themselves. Poor placement can create visible marks, uneven force, or warped parts. Many manufacturers review the full complete mold components guide before finalizing ejection layouts because ejector design affects several connected mold systems.
How does the ejector pin system work during the molding cycle?
After the mold opens, the ejector plate pushes ejector pins forward to release the cooled part from the cavity. The pins retract before the next cycle begins, making correct timing essential for smooth production.
The ejection sequence starts after cooling is complete. Once the mold halves separate, the molded part usually remains attached to the core side because of shrinkage and surface friction. The ejector system then activates and pushes the part free.
- Plastic cools inside the cavity
- Mold opens
- Ejector plate moves forward
- Pins contact the part
- Part releases from the core
- Pins retract
- Mold closes for the next cycle
According to WayKen's ejector pin guide, balanced ejection force is important for stable molding cycles. Uneven pressure can twist thin-wall parts or create visible stress marks.
Large molded parts often need multiple pins working together. A thin electronics housing, for example, may use several small pins placed near ribs and support walls to spread force evenly. Large flat panels may also use ejector sleeves or stripper systems to reduce warping.
What types of ejector pins are used in injection molds?
Different ejector pin types solve different molding problems. Through-hardened pins handle general applications, nitrided pins improve wear resistance, and coated pins reduce friction in demanding or abrasive molding conditions.
Manufacturers choose ejector pin types based on resin type, cycle count, cosmetic requirements, and mold geometry. Standard pins work well for many molds, but high-volume production usually needs upgraded materials or coatings.
| Pin Type | Best Use | Main Benefit | Main Limitation |
|---|---|---|---|
| Through-hardened pins | General molding | Low cost | Faster wear |
| Nitrided H13 pins | High-cycle molds | Better wear resistance | Higher price |
| Black coated pins | Abrasive resins | Reduced friction | Coating cost |
| Blade ejectors | Thin ribs | Better support | Complex machining |
| Ejector sleeves | Round bosses | Even pressure | Larger footprint |
Standard hardened pins are not always the best option. Abrasive resins and high-cycle molds usually justify nitrided or coated pins despite the higher upfront cost. Replacing worn pins repeatedly often costs more than upgrading materials early.
Manufacturers working with textured consumer products also use coated pins to reduce visible drag marks. Some molds for medical housings use low-friction coatings because smooth release is more important than initial tooling cost.
When ejector sleeves work better than pins
Ejector sleeves work better when the molded feature is round and hollow, such as screw bosses or cylindrical supports. A sleeve spreads force around the feature instead of concentrating pressure in one small area.
For molds with many precision moving parts, manufacturers often review compatible mold spare parts before selecting ejector systems.
What materials and coatings are best for ejector pins?
H13 steel and hardened tool steels are commonly used for ejector pins because they resist heat, wear, and deformation. Specialized coatings like DLC or nitriding reduce friction and extend service life in high-cycle molds.
Ejector pins operate under repeated pressure and heat. Soft materials wear quickly, especially in molds running glass-filled or abrasive resins. H13 tool steel is widely used because it balances toughness, hardness, and thermal stability.
Heat treatment improves durability by increasing surface hardness. Nitriding adds another protective layer that helps reduce galling and surface wear. According to Aco Mold's ejector pin guide, coated pins can also reduce friction in demanding molding conditions.
| Material or Coating | Main Advantage | Best Application |
|---|---|---|
| H13 steel | Heat resistance | High-cycle molds |
| Hardened tool steel | General durability | Standard production |
| Nitrided surface | Wear reduction | Abrasive materials |
| DLC coating | Lower friction | Cosmetic parts |
| PVD coating | Surface protection | Long production runs |
Surface finish also affects performance. Rough pins create drag and increase sticking risk. Smooth polished surfaces usually improve release consistency and reduce cosmetic damage on visible products.
Manufacturers comparing tooling materials often evaluate broader precision mold components at the same time because ejector durability affects overall mold maintenance schedules.
Why do ejector pins leave marks on molded parts?
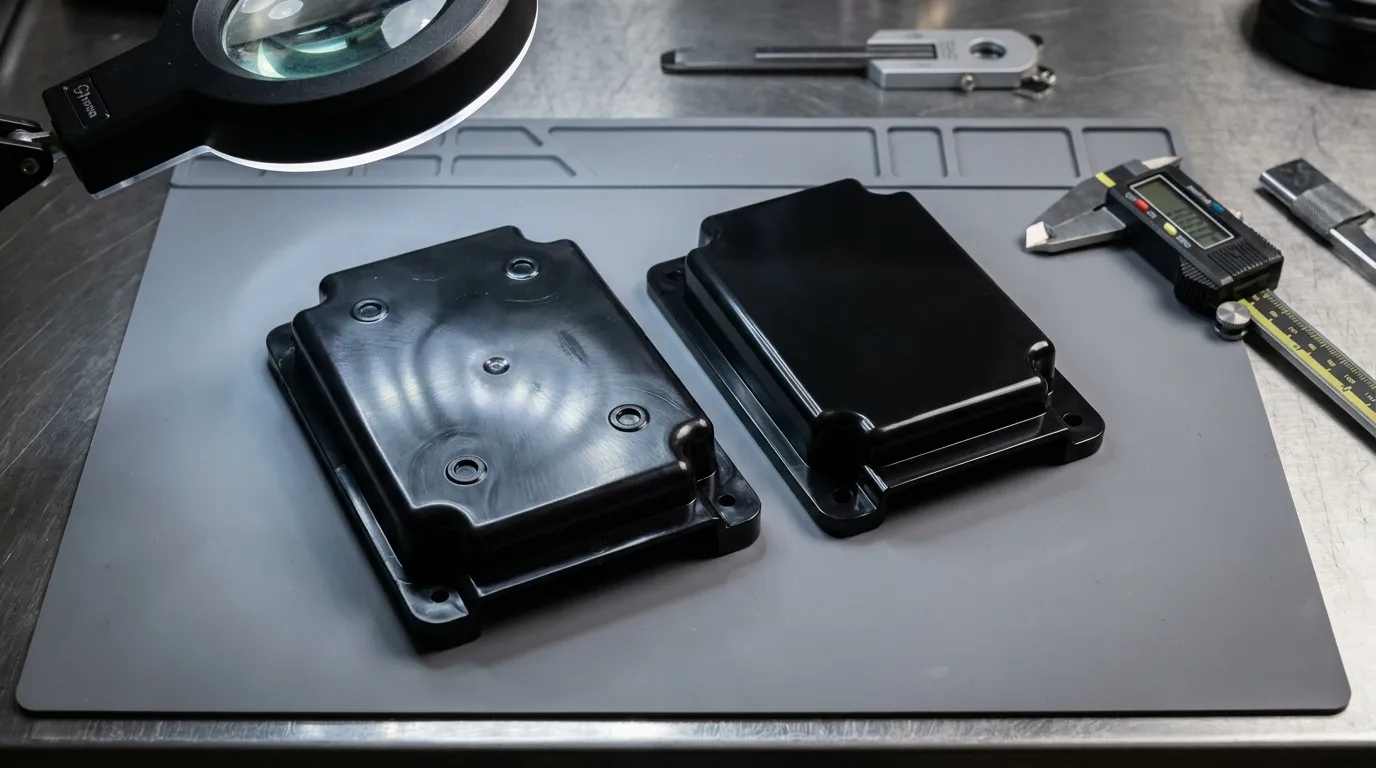
Ejector pin marks happen when concentrated ejection force pushes against soft or unsupported plastic surfaces. Poor pin placement, excessive force, or mismatched textured surfaces can make the marks more visible.
Ejector marks are one of the most common cosmetic issues in injection molding. They usually appear as small circular marks, glossy spots, or raised rings on the finished part surface. In many cases, the marks are harmless. On cosmetic products, they can become a quality problem.
According to Protolabs guidance on ejector pin placement, unsupported surfaces and high force concentration increase the visibility of marks. Thin walls and glossy finishes are especially sensitive.
| Symptom | Likely Cause | Recommended Fix |
|---|---|---|
| Deep circular marks | Excessive ejection force | Add support points |
| Glossy pin spots | Surface mismatch | Texture-match pins |
| Warped panel | Uneven force | Rebalance pin layout |
| Drag scratches | Poor release | Improve polish/coating |
Adding more ejector pins does not automatically improve ejection. Poorly balanced layouts can actually increase cosmetic defects and pin wear. The goal is balanced force, not maximum pin count.
Acceptable vs unacceptable ejector marks
Small witness marks are normal in many industrial parts. Internal housings and hidden components often allow light pin marks without affecting function.
Visible consumer products are different. A textured electronics cover or automotive trim panel may reject even minor cosmetic defects. Some manufacturers texture the pin face to match surrounding mold surfaces and reduce visible contrast.
For broader mold design basics, readers can review plastic injection mold basics alongside ejector system planning.
How are ejector pins positioned correctly?
Correct ejector pin placement spreads force evenly across the molded part. Poor positioning creates stress concentration, bending, warping, or visible defects, especially in thin-wall parts.
Pins are usually placed near strong structural features such as ribs, bosses, and thicker wall sections. These areas can absorb ejection force without deforming. Thin unsupported surfaces should avoid direct pin contact whenever possible.
Large flat parts need careful force balancing. A wide plastic panel with only a few central pins may flex during ejection and create sink marks or distortion. Adding support points near the perimeter often improves stability.
How many ejector pins are needed?
The number depends on part geometry, resin shrinkage, wall thickness, and surface finish requirements. According to FirstMold's ejector pin overview, larger parts usually need more balanced support points to prevent localized stress.
A simple consumer electronics housing may use six to ten pins. A large automotive panel can require dozens of carefully positioned ejectors working together.
Ejector Pin Placement Checklist
- Place pins near ribs and structural supports
- Avoid highly visible cosmetic surfaces
- Spread force evenly across the part
- Support thin-wall sections carefully
- Keep pin diameters large enough to resist bending
- Match textured surfaces where appearance matters
- Verify pin retraction before mold closing
Cosmetic surfaces should not rely on aggressive ejection force. Redesigning support geometry is often safer than simply increasing pin pressure.
What causes ejector pins to fail?
Ejector pins usually fail because of poor alignment, excessive ejection force, inadequate lubrication, abrasive materials, or uneven load distribution. Early symptoms include sticking, wear marks, bending, and unstable ejection cycles.
Pin failures rarely happen without warning. Most molds show early signs such as drag marks, inconsistent release, or visible wear long before a pin breaks completely. Catching those signs early helps avoid downtime and cavity damage.
Thin pins in deep cavities are especially vulnerable. A long unsupported pin can flex during ejection and gradually bend over repeated cycles. Abrasive resins also accelerate wear and increase friction.
Ejector Pin Failure Diagnosis Table
| Symptom | Likely Cause | Production Impact | Recommended Fix |
|---|---|---|---|
| Bent pins | Uneven force or undersized pin | Part distortion | Increase support or diameter |
| Sticking pins | Poor lubrication | Cycle interruption | Improve cleaning and lubrication |
| Galling | Friction between pin and bore | Surface scoring | Use coatings or polishing |
| Broken pins | Excessive pressure | Mold damage | Rebalance ejection force |
| Wear marks | Abrasive resin | Cosmetic defects | Upgrade pin material |
Bent ejector pins
Automotive interior molds commonly experience pin bending around deep ribs and narrow support features. If the pin diameter is too small, repeated force cycles eventually create deflection.
Increasing the number of support points often works better than simply using more force. Balanced layouts reduce stress on individual pins and improve long-term mold stability.
Sticking ejector pins
Pins stick when friction increases inside the ejector bore. Dirt, resin buildup, weak lubrication, or surface damage can all contribute to sticking problems.
Molds running high-cycle production schedules usually need regular inspection intervals. Many manufacturers combine ejector maintenance with broader die component systems inspections to reduce unexpected downtime.
How can manufacturers reduce ejector pin problems?
Most ejector pin failures can be reduced through correct pin sizing, balanced placement, regular inspection, lubrication control, and proper surface finishing. Preventive maintenance is usually cheaper than mold downtime and scrap losses.
The best prevention strategy starts during mold design. Proper pin diameter, placement, and support reduce stress before production even begins. Maintenance then keeps the system stable over long production runs.
High-volume molds benefit from scheduled cleaning and inspection cycles. Waiting for visible failure usually leads to more expensive repairs and production delays.
Ejector Pin Prevention Checklist
- Inspect pins regularly for wear or bending
- Polish damaged surfaces before galling spreads
- Replace weak lubrication schedules
- Use coated pins for abrasive resins
- Avoid excessive ejection pressure
- Match pin texture on cosmetic surfaces
- Verify ejector plate alignment during maintenance
- Replace worn bushings before pin movement becomes unstable
A medical mold producing smooth cosmetic housings, for example, may justify DLC-coated pins because reduced friction improves release consistency. A low-volume industrial housing may not need that extra cost.
Manufacturers managing long-term tooling wear sometimes compare ejector durability with broader tooling wear control strategies across different production systems.
Getting the Next Step Right
Ejector pins injection molding systems affect more than part removal. They influence cosmetic quality, cycle stability, maintenance costs, and mold lifespan. Small design decisions, such as pin placement or coating selection, can prevent major production problems later.
If a mold already shows sticking, witness marks, or bent pins, start by reviewing force distribution and support geometry before increasing ejection pressure. Many issues come from imbalance rather than insufficient force.
For new molds, focus on balanced layouts, durable materials, and realistic maintenance planning. Those choices usually cost less than repeated downtime and tooling repairs.
Frequently Asked Questions
What are ejector pins used for in injection molding?
Ejector pins push cooled plastic parts out of the mold cavity after molding. They help automate part removal and keep production cycles consistent while reducing manual handling.
Why do ejector pins leave circular marks?
Ejector pin marks appear when force concentrates on small contact areas during part ejection. Poor placement, excessive pressure, or soft plastic surfaces can make the marks more visible.
What material is best for ejector pins?
Hardened tool steel and H13 steel are common choices because they resist heat, wear, and deformation. Coatings such as nitriding or DLC improve lifespan in abrasive molding environments.
How many ejector pins should a mold have?
The number of ejector pins depends on part size, wall thickness, geometry, and ejection force requirements. Larger or more flexible parts usually need additional support points for balanced release.
What causes ejector pins to bend?
Ejector pins bend when they experience uneven force, poor alignment, excessive pressure, or weak support. Thin pins inside deep cavities are especially vulnerable to deflection over repeated cycles.
Can ejector pins be used on textured surfaces?
Yes, but the pin surface often needs matching texture treatment to avoid visible glossy circles. Proper finishing helps the ejector area blend with the surrounding molded surface.
Share:


Written By miashuvo
NEWS
GET SERVICE
With quality parts to meet every budget and friendly staff trained to make your visit informative and hassle free.